Welcome to the next episode of the SMSAPI “Do it yourself” Guide. In the next couple of minutes, you’ll learn how to set up your account and start using SMSAPI within minutes.
Watch the video tutorial on how to use the basic functions of the SMSAPI Customer Portal
Activating your account
To take full advantage of the platform’s functions, you must fill in the company details by clicking “Activate account” or the Payments tab and Activate account.
Providing company data is a condition for successful account activation. Only then your Account Manager can verify it. If your company doesn’t have a Value Added Tax identification number, you will be asked to send us the scan of your registration documents.

How to speed up the account activation?
It is important to pay special attention to the correctness of the data you input and fill in all the fields because it will be placed on the next invoice and minimizes the time spent on verification.
You may ask why we need so much information at the beginning. Unfortunately, some people want to misuse our service, and we have to protect it against phishing and other abuses. We also encourage you to enter the email address to which electronic invoices will be sent and provide the contact number for accounting.
Now you can take a look around! At the time, your Account Manager verifies the company data provided and activates the account. Information on correct verification is sent by email.
Adding your first SMS sender name
The next step is to add your SMS sender name (also known as SMS branding) by using the shortcut in the Dashboard “Add sender name” or clicking in the left column on SMS Messages and then Senders.
SMS sender names and local law
Alphanumeric sender name helps to identify the sender of the message. It can be, for example, the name of the company or product. GSM standard restrictions allow the use of up to 11 characters. To input your phone number as a sender name, you have to verify it with an SMS message sent on this number.
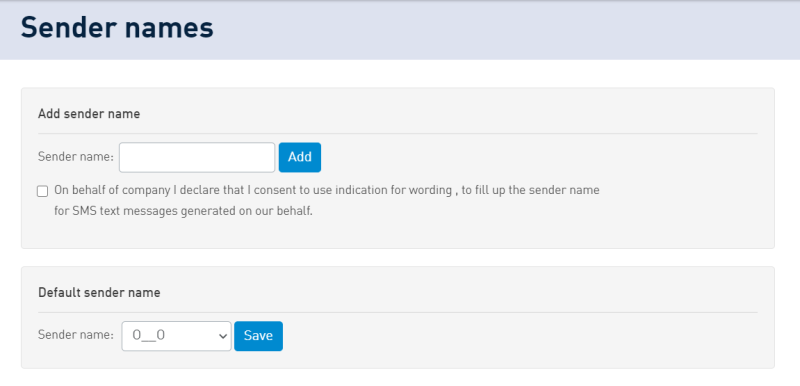
Each time you add a name, you must mark a statement that confirms the sender’s right to use it. To prevent abuse of the sender names, a consultant from our Customer Support Department verifies each of them. Information on correct verification is sent by email.
Charging the SMSAPI account
The last preparatory step is topping up the account. Choose the “Recharge account” shortcut in the dashboard or the upper right corner in the Payments tab. Available payment methods are bank transfer and credit or debit cards. It’s also possible to use automatic payments by prior arrangement with your Account Manager. It is worth remembering that the minimum top-up amount is 30 EUR.
To quickly calculate the top-up value, check your account balance and the rate for the SMS for the particular destination. Remember that 1 point equals 1 EUR. So, for instance, to send 1000 messages with a rate of 0,05 EUR, you need to top up your account for 50 EUR. Below the field, with the top-up amount, there is an option to enter a promo code.
The next time you log in to SMSAPI, you’ll be asked to agree to send marketing information via email, SMS, and chat messages in the Customer Portal. Trust us, and we won’t spam you. All the materials we prepare are for education and make yourself comfortable here at SMSAPI.
Next step: SMS Gateway


